
Did you just launch or are about to launch a brand new, redesigned or rebuilt website? Make sure you do these 7 things after your website launch. These steps are standard operating procedure for any site Webbuilders launches for a client
1. Make sure your Google Analytics (or other trackers) are working
After the launch of your new site you’ll want to make sure your Google Analytics (GA) or other tracking software is working. An easy way to test Google Analytics is by going to your website in your browser and then in another tab, open your GA dashboard and navigate to the Realtime > Overview section. You should see at least 1 (hopefully more!) active users on your site. If the active users on site counter is displaying 0 make sure you’ve disabled any privacy blockers in your browser. If you’re still seeing 0 you may want to consider reaching out to a web developer for help troubleshooting the issue.
Google Analytics Realtime Overview dashboard
2. Add your site to Google Search Console and submit your sitemap.xml
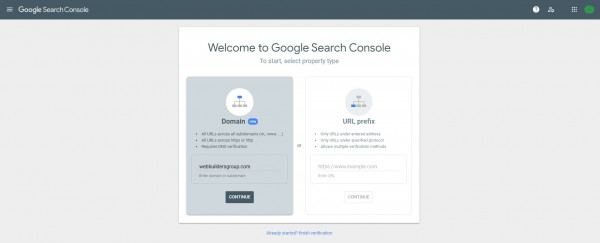
Google Search Console is a tool that can help you improve your site’s appearance on Google Search. If you want to take advantage of it you have to submit your site and verify ownership. To start, navigate to the welcome page for Google Search Console. You will be presented with two options to submit your website to Search Console. We recommend using the “Domain” option. Enter the URL for your website. If I was adding our website for instance, I would enter “webbuildersgroup.com” without the quotes.
You’ll need to verify ownership using a DNS txt record. Add the txt record provided to you to your DNS records, navigate back to Search Console and click the “Verify” button. If it doesn’t work right away, try waiting 5-10 minutes. If you’re not sure how to add a DNS txt record we recommend reaching out to your IT team or a web developer, they should be able to help.
Submit your sitemap.xml
Now that you’ve verified ownership of the domain you will want to submit your sitemap.xml. Navigate to the “Sitemaps” page in Search Console.

In the “add new sitemap” section enter the URL for your sitemap. This is most likely going to be sitemap.xml. Click the “submit” button. After submitting your sitemap you should see your sitemap in the list of “submitted sitemaps”
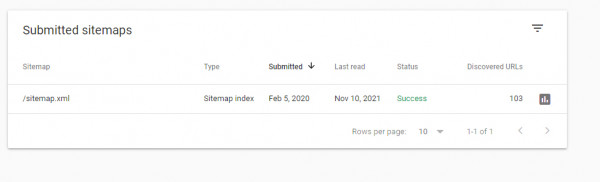
If you do not see the green “Success” in the Status column clicking on the listing will let you know what issues Google is having reading your sitemap.xml.
3. Test your robots.txt
If you’re not familiar with robots.txt or are interested in learning how it can impact your Search Engine Optimization (SEO) check out our What is Technical SEO blog post.
If you have a robots.txt on your website you should check and make sure it is configured properly. One way you can do that is using Google’s Robots Testing Tool.
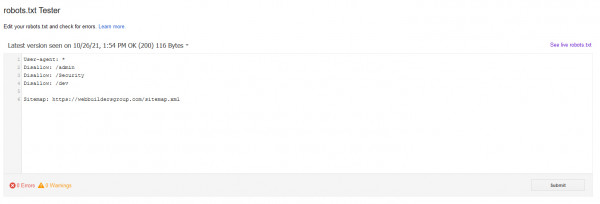
If you see errors, or warnings you’ll want to investigate and fix them.
4. Test https and www/non-www redirects
Hopefully you've configured an SSL certificate for your website (if you haven't you definitely should). You'll want to make sure that requests to the http:// version of your website are redirected to the https version.
For www/non-www you'll want to make sure that you're redirecting to your preferred version. If your website is accessible from www & non-www Google will see those as two different websites which can affect your SEO.
5. Run a page speed test
Page speed is the time it takes for your page load when a user tries to view a page on your website. Now that you’ve launched your site you should run a page speed testing tool to measure the speed and performance of your website. You may discover opportunities to make your website faster. We recommend using Google’s PageSpeed Insights tool. Enter your website URL and click the “analyze” button. You’ll likely need the help of a web developer to implement any of the recommendations found by the PageSpeed insights tool.
6. Test forms
This is probably one of the most important things you can do after launching your website. You’ll want to test the forms on your website to make sure they can be submitted and to make sure you or your sales team receives the submission email. You wouldn’t want to find out 3 months down the line that your sales team was not receiving submissions and thus missing out on sale opportunities.
7. Set up ping monitoring
Ping monitoring enables you to set up automated monitoring of your websites uptime. If the tool detects that your website is down it can alert you by email that there is a problem, which means you can act faster in fixing the issue and getting your website back online. Webbuilders uses New Relic for its ping monitoring. New Relic is completely free but a bit complicated to set up. If you need help setting up ping monitoring please reach out.
Conclusion
You’ll thank yourself for applying these 7 steps to your next website launch. Finding out your analytics isn't working, or your forms weren’t working correctly 3 months after your site launch would mean you’ve lost a lot of valuable data and sales opportunities. If you think we’re missing something from this list we’d love to know, please reach out. Happy website launching!