
A Google Maps API Key is like a password that allows your website to display interactive maps from Google’s Map platform. Without this Key, your website will produce an error if you try to embed/add a Google Map on one of your pages.
Although Google has both documentation and an instructional video available to guide you in creating these keys, they are a bit generalized (and at times a bit technical). So, in this post we provide specific steps on how to get a Google Maps key for use on your website.
STEP 1: Create a Google account (if you don’t have one already):
https://accounts.google.com/signup
STEP 2: Open the Google Cloud Platform Console (logging in with your Google Account):
https://console.cloud.google.com
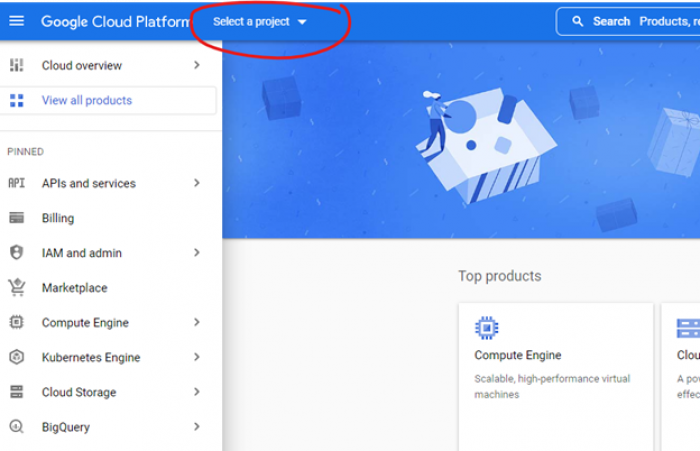
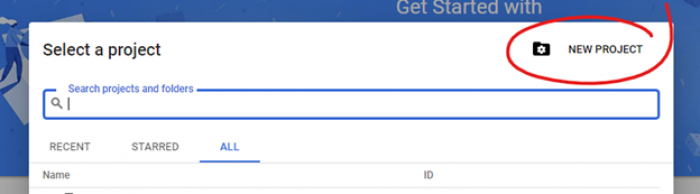
STEP 3: Create a New Project (or select an existing one, if you have one)
This is found at the top left of the page, just to the right of the “Google Cloud Platform” logo. See the following screenshots for reference.
First this:
And then this:
STEP 4: Give your project a name (perhaps based on your website’s name).
You can leave the Location field as-is for now. Click Create.
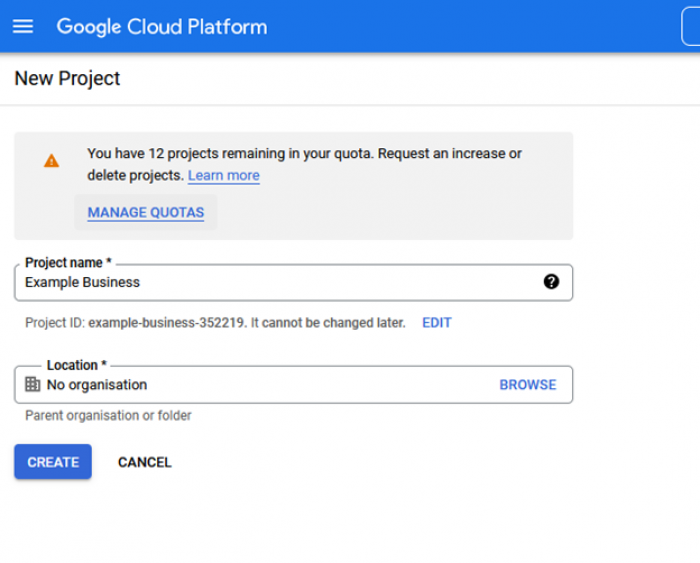
Screenshot of Google Cloud Platform - New Project naming
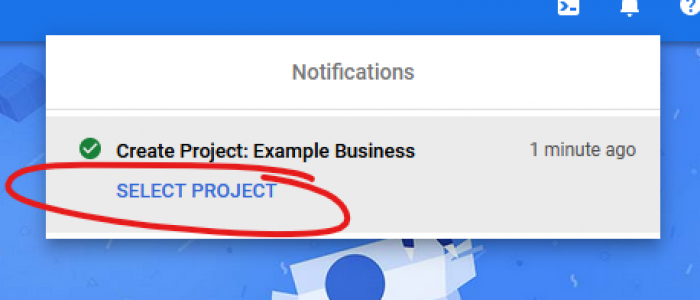
STEP 5: Select the Project you just created. You can do this by the notification at the top right:
(or if you missed this notification, simply go back to the dashboard and select your project from the top-left: https://console.cloud.google.com/home/dashboard)
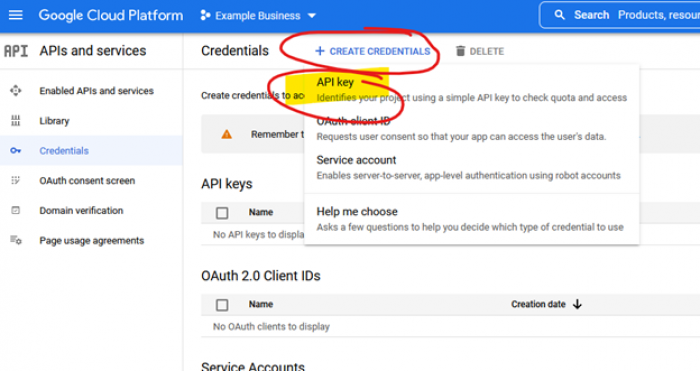
STEP 6: Create the API key. On the API Credentials page click the “+CREATE CREDENTIALS” button, and then choose “API Key”. NOTE: your selected project should be shown in the top-left.
You can close the window that shows your key for now.
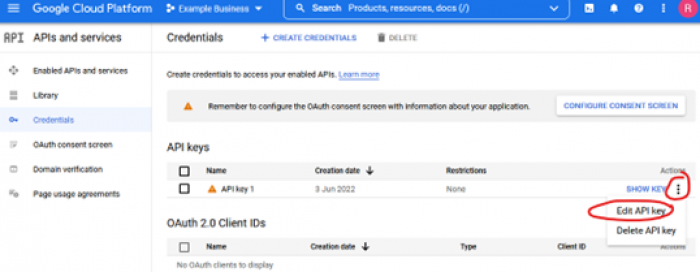
STEP 7: Restrict the Key. Click the Edit icon next to your newly created Key:
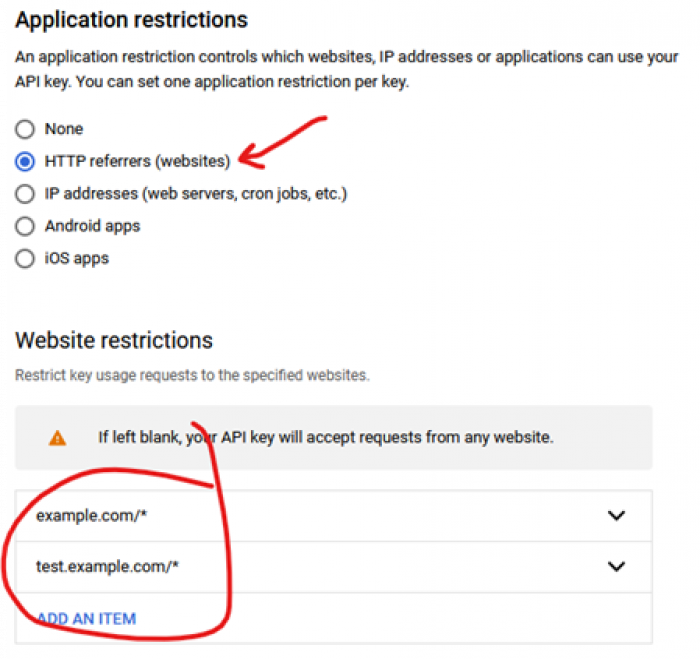
Under “Application restrictions”, Choose “HTTP referrers (websites)” and then under “Website restrictions”, click “ADD AN ITEM” for each web address you need to be able to serve maps on. To save you the effort of adding every page on your website, you can use an asterisk (*) to act as a ‘wildcard’. Most websites will only need two (the live website, such as “example.com/*” and the staging/test site; for example, “test.example.com/*”). See the following screenshot for reference. Once entered, you can hit Save.
NOTE: don’t worry about the “API restrictions” field at the bottom, you can leave this as “Don’t restrict key”.
STEP 8: Enable the various Map services. In short, visit each of the links below, and click ‘Enable’
FYI: more Map-related services can be turned on here, but for now these two should do what we need.
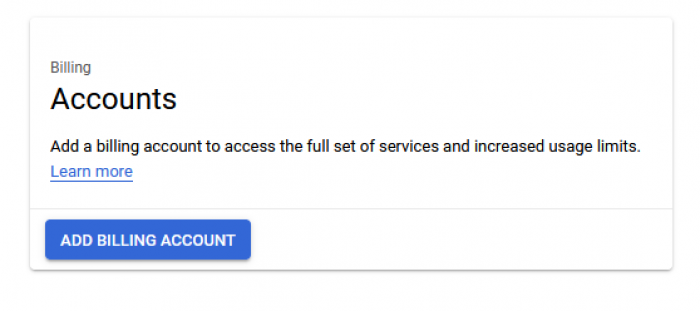
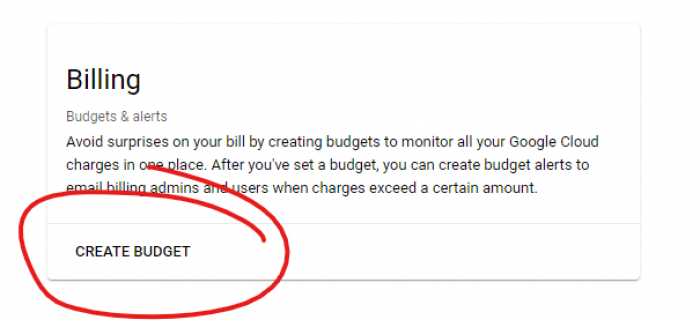
STEP 9: Set up billing and budgets
For many low-traffic sites, Google Maps will be free. BUT, you still have Billing information attached to your account. You can also set thresholds so that you aren’t changed more than expected (e.g., $0)
- Go to the Billing page, and click Add Billing Account
Walk through the following screens (adding your phone, address, and payment information).
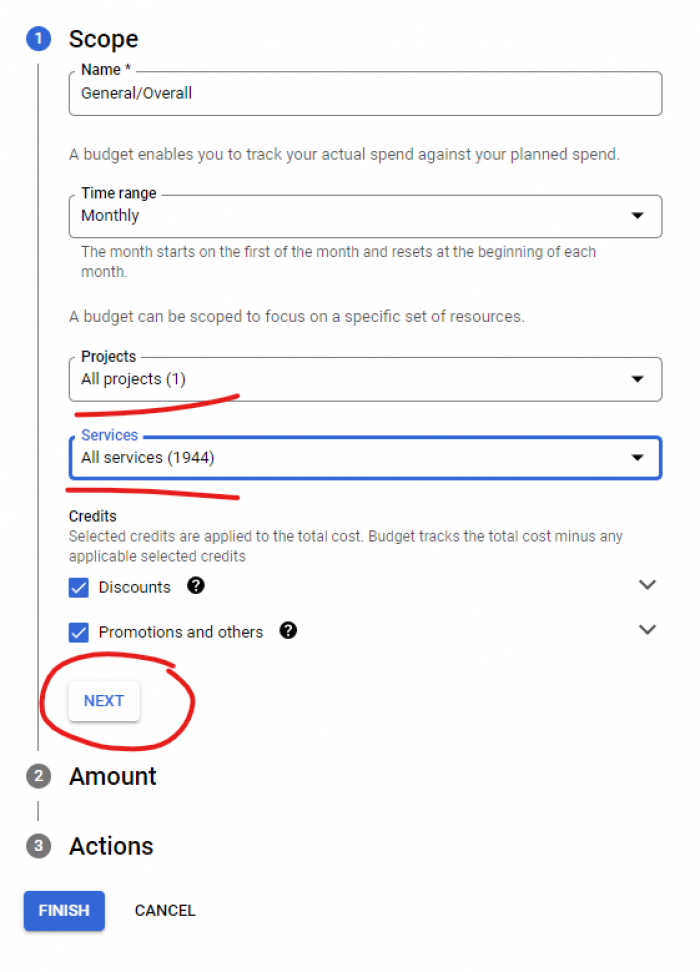
- Now, let’s set a Budget (https://console.cloud.google.com/billing/budgets).
- Give the Budget a name. Leave Time Range as Monthly. Leave the Projects as ‘All’, and Services as ‘All’, then hit Next
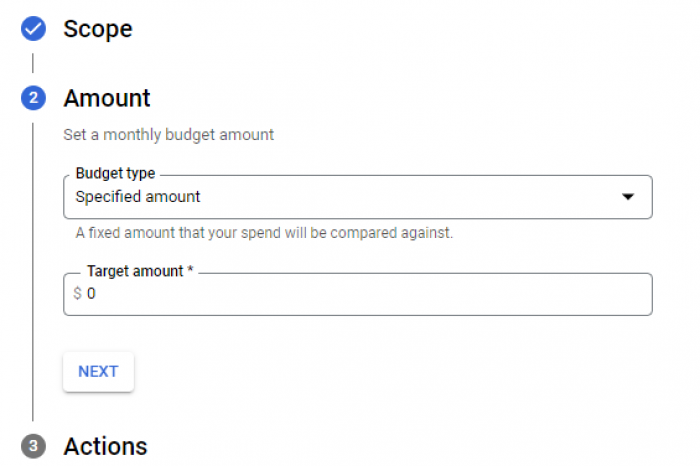
- In the Amount step, here you can set the budget as $0 so you won’t be billed. If you get a large amount of traffic that passes their ‘free’ threshold, the maps will stop working, so you can decide if you want to increase this budget at a later date. See their pricing page for more information. Hit Next when ready.
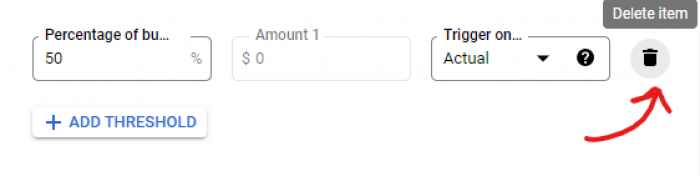
- Lastly, you can set Actions to trigger if your billing threshold is hit. If you opted to use $0 on the previous step, you can just delete the default actions and hit Finish.
STEP 10: share the key with your web developer. Go back to the Credentials page, click the “show key” button beside your key, then copy and send this to your dev team.
Done!